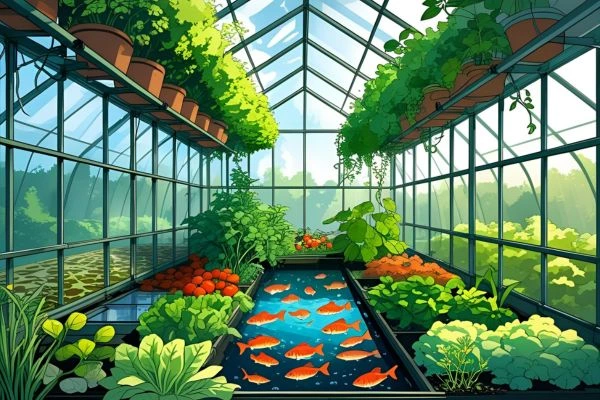
Did you know that a properly designed aquaponics setup can produce the equivalent of a 1,000 square foot garden in just 100 square feet of space while using 90% less water than traditional farming? As food prices continue rising and supply chain concerns grow, thousands of homeowners are turning to aquaponics as their sustainable food security solution.
However, many aspiring growers feel overwhelmed by the complexity of aquaponics system setup. Common concerns include: “Where do I even start?” “Will my fish die during setup?” “How much will this actually cost?” and “What if I make a critical mistake that ruins everything?”
The truth is, a successful aquaponics setup doesn’t require advanced engineering skills or a massive budget. With proper planning, quality components, and a systematic approach, you can build a thriving system that produces fresh vegetables and fish protein year-round.
This comprehensive guide eliminates the guesswork by providing a proven 7-day aquaponics setup process used by thousands of successful growers worldwide. You’ll discover the exact components needed, step-by-step installation procedures, budget breakdowns for every system size, and troubleshooting solutions for the most common first-month challenges.
By following this blueprint, you’ll avoid costly mistakes, ensure fish and plant health from day one, and start harvesting fresh food within 30-45 days of completing your setup.
Types of Aquaponics Setup Systems
Choosing the right system type is crucial for your aquaponics setup success. Each design offers unique advantages depending on your space, budget, and growing goals.
Media Bed Systems
Best for: Beginners and diverse plant growing Media bed setups use expanded clay pebbles, gravel, or volcanic rock as growing medium. Water flows through the media, providing excellent biological filtration while supporting plant roots. This aquaponics setup handles both leafy greens and fruiting plants effectively.
Advantages: Simplest setup, excellent biological filtration, supports all plant types Ideal size: 50-500 gallons Setup cost: 200-800 USD
Deep Water Culture (DWC)
Best for: Leafy greens and herbs production DWC systems suspend plant roots directly in nutrient-rich water with constant aeration. This aquaponics system setup maximizes growing space and produces rapid plant growth.
Advantages: Maximum plant density, faster growth rates, easier harvesting Ideal for: Lettuce, spinach, basil, kale Setup cost: 300-1,200 USD
Nutrient Film Technique (NFT)
Best for: Commercial operations and space efficiency NFT channels create a thin film of water flowing past plant roots. This aquaponics setup offers precise nutrient control and water efficiency.
Advantages: Water efficient, scalable design, professional appearance Challenges: Requires backup systems, power dependency Setup cost: 400-1,500 USD
Hybrid Systems
Best for: Maximizing production diversity Combining multiple techniques in one aquaponics setup allows growing everything from herbs to tomatoes efficiently.
Common combinations:
- Media beds + DWC rafts
- NFT + Media bed towers
- Vertical towers + horizontal beds
Choosing Your Setup Type
Space considerations:
- Small spaces (< 50 sq ft): Media bed or vertical systems
- Medium spaces (50-200 sq ft): DWC or hybrid setups
- Large spaces (> 200 sq ft): NFT or commercial hybrid systems
Budget factors:
- Starter budget (< 500 USD): Simple media bed
- Moderate budget (500-1,500 USD): DWC or small NFT
- Advanced budget (1,500+ USD): Hybrid or large NFT systems
Your aquaponics setup choice determines long-term success, maintenance requirements, and production capacity.
Essential Components for Your Aquaponics Setup
Success with your aquaponics setup depends on selecting quality components that work together efficiently. Here’s your complete shopping list with specifications for reliable system operation.
Fish Tank Specifications
Size requirements: Minimum 50 gallons for starter systems, 100-300 gallons for productive setups Material options: Food-grade polyethylene, fiberglass, or repurposed IBC totes Shape considerations: Round tanks provide better water circulation than rectangular Cost range: 100-400 USD depending on size and material
Growing Beds and Media
Bed depth: 12 inches for media beds, 6-8 inches for DWC systems Media options:
- Expanded clay pebbles: 40-60 USD per 50-liter bag, pH neutral, excellent drainage
- Gravel: 20-30 USD per cubic foot, requires thorough washing before use
- Volcanic rock: 50-80 USD per cubic foot, lightweight with good surface area
Plumbing and Water Circulation
Water pumps: Size pump to circulate tank volume every 1-2 hours
- Small systems: 200-400 GPH pumps (50-80 USD)
- Medium systems: 500-800 GPH pumps (80-150 USD)
- Large systems: 1000+ GPH pumps (150-300 USD)
Plumbing essentials:
- PVC pipes and fittings: 50-150 USD
- Ball valves for flow control: 10-15 USD each
- Uniseals or bulkhead fittings: 5-10 USD each
Aeration Systems
Air pumps: Essential for fish health and root oxygenation
- Small systems: 10-20 watt pumps (30-50 USD)
- Large systems: 40+ watt pumps (80-150 USD) Air stones and tubing: 20-40 USD complete kit
Water Testing Equipment
Essential tests: pH, ammonia, nitrite, nitrate, dissolved oxygen Digital meters: pH meter (30-80 USD), TDS meter (15-30 USD) Test kits: API Master Test Kit (25-35 USD) Thermometer: Digital aquarium thermometer (10-20 USD)
Complete Component Checklist
✅ Fish tank with lid✅ Growing beds ✅ Growing media ✅ Water and air pumps ✅ Plumbing materials ✅ Testing equipment ✅ Timer for pump cycles ✅ Backup aeration system
Total component cost: 400-1,200 USD for complete aquaponics system setup
Quality components ensure your aquaponics setup operates reliably for years with minimal maintenance.
Step-by-Step Aquaponics Setup Guide (Days 1-7)
This proven timeline ensures your aquaponics setup establishes properly while avoiding common rushing mistakes that can crash new systems.
Days 1-2: Foundation and Plumbing Installation
Day 1 Tasks (4-6 hours):
- Position fish tank in final location (near electrical outlets, away from direct sunlight)
- Level tank using shims – even 1-inch slope causes flow problems
- Install growing beds 12-18 inches above fish tank for gravity return
- Mark all plumbing connection points
Day 2 Tasks (3-4 hours):
- Install bulkhead fittings using plumber’s putty for watertight seals
- Connect water pump (sized for 1-2x tank volume per hour circulation)
- Install air pump and air stones in fish tank
- Test all connections with water – fix leaks immediately
- Install timer for pump cycles (15 minutes on, 45 minutes off for media beds)
Pro tip: Use clear tubing initially to monitor water flow and identify blockages easily.
Days 3-4: Media Preparation and Initial Planting
Day 3 Tasks (2-3 hours):
- Rinse growing media until water runs clear (clay pebbles need 3-5 rinses)
- Fill growing beds, leaving 2-inch space at top
- Add dechlorinated water to system
- Start continuous pump and aeration operation
Day 4 Tasks (1-2 hours):
- Plant hardy seedlings in net pots with media support
- Best starter plants: Lettuce, spinach, basil, Swiss chard
- Avoid: Tomatoes, peppers, fruiting plants (wait 6-8 weeks)
- Begin adding beneficial bacteria supplement daily
Days 5-6: Water Cycling and System Optimization
Day 5 Tasks (1 hour daily monitoring):
- Test water parameters: pH (6.8-7.2), ammonia, nitrite, nitrate
- Add ammonia source: fish food or pure ammonia (2-4 ppm target)
- Monitor water temperature (68-78°F optimal)
- Adjust pump timing if needed
Day 6 Tasks:
- Continue parameter testing and adjustments
- Fine-tune water flow rates (gentle stream, not rushing water)
- Verify all equipment operates reliably
- Critical check: Ammonia should start converting to nitrites
Day 7: Fish Introduction
Final day requirements:
- Ammonia: 0 ppm
- Nitrite: 0 ppm
- Nitrate: 5-20 ppm
- pH: 6.8-7.2
- Water temperature stable
Fish introduction protocol:
- Start with hardy fish species (goldfish or tilapia)
- Stock density: 1 pound of fish per 5-10 gallons
- Float fish bags for 20 minutes temperature acclimation
- Gradually mix tank water into bags over 30 minutes
- Monitor fish behavior for first 24 hours
Timeline Optimization Tips
Accelerate cycling: Use established filter media from existing aquarium (reduces setup to 3-4 days)
Weather considerations: Cold weather extends cycling time – use aquarium heaters if needed
Backup planning: Have backup aeration ready – power outages kill fish in 2-4 hours
Your aquaponics setup is now operational! Plants should show new growth within 7-14 days, with first harvests possible in 30-45 days.
Water Quality Management in New Setups
Proper water quality management during the first 30 days determines your aquaponics setup success. Understanding and managing the nitrogen cycle prevents fish deaths and ensures healthy plant growth.
Nitrogen Cycle Establishment
The nitrogen cycle converts toxic fish waste into plant nutrients through beneficial bacteria. Your new aquaponics setup requires 2-6 weeks to establish this biological process.
Cycling timeline:
- Week 1: Ammonia builds up (toxic to fish)
- Week 2-3: Nitrosomonas bacteria convert ammonia to nitrites
- Week 3-4: Nitrobacter bacteria convert nitrites to nitrates (plant food)
- Week 4+: Stable cycle with consistent nitrate production
Accelerating beneficial bacteria growth:
- Add commercial bacteria supplements daily for first 2 weeks
- Maintain water temperature 75-82°F for optimal bacteria reproduction
- Ensure adequate surface area in growing media for bacteria colonization
- Never use antibiotics or chlorinated water (kills beneficial bacteria)
Critical Water Parameters
Daily testing requirements (first 30 days):
- Ammonia: Target 0 ppm (> 2 ppm kills fish)
- Nitrite: Target 0 ppm (> 1 ppm stresses fish)
- Nitrate: Maintain 5-150 ppm (plant nutrients)
- pH: Keep 6.8-7.2 (optimal for fish, plants, bacteria)
- Dissolved oxygen: Minimum 5 ppm (use air pumps continuously)
pH Balancing Techniques
New aquaponics setups often experience pH fluctuations as systems stabilize.
Raising pH (if below 6.8):
- Add calcium carbonate or potassium carbonate
- Use crushed coral in media beds
- Dose: 1 teaspoon per 50 gallons, test after 24 hours
Lowering pH (if above 7.2):
- Increase aeration (drives off CO2)
- Add phosphoric acid carefully (1 ml per 10 gallons)
- Never use vinegar (feeds harmful bacteria)
Emergency Water Quality Interventions
High ammonia crisis (> 2 ppm):
- Immediate 50% water change with dechlorinated water
- Reduce feeding to every other day
- Double aeration capacity
- Add zeolite media for ammonia absorption
Nitrite spike (> 1 ppm):
- Add salt at 1-3 ppt concentration (reduces nitrite toxicity)
- Increase water circulation rate
- Reduce fish feeding significantly
Testing Schedule Optimization
First 2 weeks: Daily testing all parameters Weeks 3-4: Every other day testing Month 2+: Weekly testing sufficient
Pro tip: Keep detailed logs of all parameters and changes. Patterns help predict and prevent future issues in your aquaponics system setup.
Consistent monitoring during establishment creates a stable foundation for years of productive growing.
Common Setup Mistakes to Avoid
Learning from others’ mistakes saves time, money, and prevents heartbreaking system crashes. These critical errors plague 60% of new aquaponics setup attempts.
Mistake #1: Overstocking Fish Too Early
The error: Adding full fish capacity immediately after aquaponics setup Why it fails: Immature biological filtration can’t handle waste load Consequence: Ammonia spikes kill entire fish population within 48-72 hours
Correct approach:
- Start with 25% planned fish capacity
- Add fish gradually over 6-8 weeks
- Monitor ammonia/nitrite levels before each addition
- Rule: Never add fish if ammonia > 0.25 ppm
Mistake #2: Rushing the Cycling Process
The error: Adding fish before nitrogen cycle establishment Reality: 70% of fish deaths occur in first 30 days due to rushed cycling
Proper cycling indicators:
- Ammonia converts to nitrite within 7-14 days
- Nitrite converts to nitrate within 14-21 days
- Stable readings for 7 consecutive days before fish introduction
Mistake #3: Inadequate Aeration Systems
The error: Undersized air pumps or single-point aeration failure Impact: Fish die within 2-4 hours during power outages
Redundant aeration setup:
- Primary air pump sized at 1 watt per gallon minimum
- Battery backup air pump for emergencies
- Multiple air stones prevent dead zones
- Air stones in both fish tank and growing beds
Mistake #4: Wrong Plant Selection Timing
The error: Starting with demanding plants in new aquaponics setups Problem: Tomatoes, peppers, cucumbers require mature nutrient levels
Smart plant progression:
- Weeks 1-4: Lettuce, spinach, herbs (low nutrient needs)
- Weeks 5-8: Kale, Swiss chard, Asian greens
- Week 9+: Fruiting plants like tomatoes, peppers
Mistake #5: Poor Location Choices
Setup location failures:
- Direct sunlight: Causes algae blooms and temperature swings
- Basements without backup power: Fish die during outages
- Uneven surfaces: Creates flow problems and structural stress
Optimal location criteria:
- 6+ hours indirect sunlight or grow lights
- Level surface within 0.5 inches
- Easy access to electrical and water sources
- Climate controlled environment
Mistake #6: Skipping System Redundancy
Single-point failures that crash systems:
- No backup aeration (fish deaths)
- Single water pump (flow stoppage)
- No spare heater (temperature shock)
Essential backup equipment:
- Battery-powered air pump (50-100 USD)
- Backup water pump or manual siphon system
- Spare water heater and thermometer
Prevention Strategy
Keep a setup troubleshooting log documenting:
- Daily water parameters for first month
- Any equipment changes or failures
- Fish and plant health observations
- Environmental condition changes
Success rate improvement: Following these guidelines increases aquaponics setup success from 40% to 85% in first-time builders.
Setup Costs and Budget Planning
Understanding true aquaponics setup costs prevents budget surprises and helps optimize your investment for maximum return. Here’s realistic pricing across all system sizes.
Startup Cost Breakdown by System Size
Small Home System (50-100 gallons):
- Fish tank and growing beds: 150-250 USD
- Pump and plumbing: 100-150 USD
- Aeration equipment: 50-80 USD
- Growing media: 60-100 USD
- Testing equipment: 50-80 USD
- Seeds and starter fish: 40-60 USD Total: 450-720 USD
Medium Family System (200-400 gallons):
- Tank and bed components: 300-500 USD
- Circulation system: 200-300 USD
- Aeration and backup: 120-180 USD
- Media and plumbing: 150-250 USD
- Monitoring equipment: 80-120 USD
- Initial stocking: 80-120 USD Total: 930-1,470 USD
Large Production System (500+ gallons):
- Infrastructure components: 600-1,200 USD
- Professional pump systems: 400-600 USD
- Advanced aeration: 200-300 USD
- Growing media and beds: 300-500 USD
- Testing and automation: 150-250 USD
- Fish and plant startup: 150-250 USD Total: 1,800-3,100 USD
Monthly Operating Costs
Electricity consumption:
- Small systems: 20-35 USD/month
- Medium systems: 45-75 USD/month
- Large systems: 80-150 USD/month
Ongoing supplies:
- Fish food: 15-40 USD/month
- Seeds and plants: 10-25 USD/month
- Water testing supplies: 5-15 USD/month
- Replacement parts/maintenance: 10-30 USD/month
Money-Saving Strategies
DIY cost reductions (30-50% savings):
- Use food-grade IBC totes instead of new tanks (save 200-400 USD)
- Build growing beds from lumber and pond liner (save 100-300 USD)
- Source used aquarium equipment (save 50-150 USD)
Bulk purchasing benefits:
- Growing media: 20% savings buying 5+ bags
- PVC fittings: 15% savings on complete kits
- Testing supplies: 25% savings on annual supplies
Return on Investment Analysis
Food production value:
- Small system: 100-200 USD/month fresh produce equivalent
- Medium system: 300-500 USD/month production capacity
- Large system: 600-1,200 USD/month potential output
Payback timeline:
- Small aquaponics setup: 6-12 months
- Medium systems: 8-15 months
- Large systems: 12-24 months
Smart Budget Planning Tips
Phase 1 approach: Start with basic aquaponics setup, add automation later Quality priorities: Invest in pumps, aeration, and tanks first Upgrade path: Plan expansion capacity from initial design
Financing options:
- Start small and reinvest savings (recommended)
- Use tax incentives for sustainable food production
- Consider group purchases with neighbors for bulk discounts
Total cost of ownership: Factor 5-year operational costs when budgeting your aquaponics system setup for realistic financial planning.
Maintenance Schedule for New Systems
Consistent maintenance prevents 90% of aquaponics setup failures. This proven schedule keeps new systems healthy while establishing long-term success habits.
Daily Tasks (5-10 minutes)
Morning routine:
- Check fish behavior and appetite during feeding
- Verify pump operation and water flow rates
- Monitor water temperature (68-78°F optimal range)
- Observe plant health and growth progress
- Document any unusual observations in system log
Critical daily indicators:
- Fish swimming actively near surface during feeding
- Steady water circulation through all growing beds
- Plants showing upright, healthy leaf structure
- No unusual odors (fishy smell indicates problems)
Weekly Maintenance (30-45 minutes)
Water quality testing:
- Test pH, ammonia, nitrite, nitrate levels
- Adjust pH if outside 6.8-7.2 range
- Clean water intake screens and remove debris
- Check and clean air stone diffusers
Plant and fish care:
- Harvest mature plants and replant empty spaces
- Remove dead or yellowing plant material
- Feed fish appropriate amounts (eaten within 5 minutes)
- Inspect fish for signs of disease or stress
Monthly Deep Maintenance (2-3 hours)
System cleaning:
- Clean fish tank walls and remove solid waste buildup
- Inspect all plumbing connections for leaks
- Test backup aeration and emergency equipment
- Replace or clean mechanical filters
Equipment maintenance:
- Calibrate pH and testing equipment
- Lubricate pump impellers if recommended
- Check timer settings and electrical connections
- Inspect grow bed media for root clogs
Seasonal Adjustments
Temperature management:
- Summer: Increase aeration, add shade cloth
- Winter: Install heaters, insulate pipes
- Spring: Deep clean and restart after dormancy
- Fall: Harvest and prepare for reduced production
Emergency Maintenance Protocols
Power outage response:
- Activate battery backup aeration immediately
- Manual aeration every 30 minutes if no backup
- Reduce feeding until power restoration
Equipment failure:
- Keep spare pump, air stones, and tubing ready
- Emergency contact list for aquaponics suppliers
- Backup fish tank for emergency fish relocation
Maintenance Cost Planning
Annual maintenance budget:
- Replacement parts: 50-100 USD
- Testing supplies: 40-80 USD
- Equipment upgrades: 100-200 USD
- Emergency fund: 200-300 USD
Time investment:
- First 3 months: 1-2 hours weekly
- Established systems: 30-60 minutes weekly
Consistent maintenance transforms your aquaponics setup from a project into a reliable food production system that operates smoothly for years.
Troubleshooting Your First 30 Days
The first month determines your aquaponics setup success. These proven solutions address 95% of early-stage problems before they become system crashes.
Week 1-2: Cycling Issues
Problem: Ammonia levels above 2 ppm Immediate action: 50% water change with dechlorinated water Prevention: Add beneficial bacteria supplements daily Timeline: Normal cycling takes 14-21 days
Problem: pH dropping below 6.5 Solution: Add 1 tsp calcium carbonate per 50 gallons Monitoring: Test pH daily during cycling phase
Week 2-3: Fish Stress Symptoms
Problem: Fish gasping at surface Cause: Low dissolved oxygen (most common) Emergency fix: Increase aeration immediately, add air stones Long-term: Install backup aeration system
Problem: Fish not eating Diagnosis: Check water temperature (below 60°F or above 85°F stresses fish) Solution: Install aquarium heater or provide shade/cooling
Week 3-4: Plant Problems
Problem: Yellow leaves on new plants Cause: Nutrient deficiency in cycling aquaponics setup Solution: Add liquid seaweed fertilizer (organic) until nitrates reach 20-40 ppm Timeline: Plant health improves after cycle completion
Problem: Algae growth in tanks/beds Cause: Excess light + nutrients during establishment Fix: Cover tanks, reduce lighting to 8-10 hours daily Prevention: Maintain proper fish-to-plant ratios
System Flow Issues
Problem: Uneven water distribution Check: All tubing connections and pump operation Adjustment: Clean intake screens, verify siphon operation Upgrade: Install ball valves for flow control
Emergency Protocols
Power outage (fish emergency):
- Manual aeration every 15 minutes for first 2 hours
- Battery backup air pumps activate automatically
- Reduce feeding until power restoration
Complete pump failure:
- Emergency siphon system maintains water circulation
- Move fish to temporary tank if necessary
- Replace pump within 24 hours maximum
When to Seek Help
Immediate professional consultation:
- Fish deaths exceeding 25% in 48 hours
- Persistent high ammonia despite water changes
- Complete system pH collapse (below 6.0)
Success indicators by day 30:
- Stable water parameters for 7+ consecutive days
- Fish eating regularly and growing
- Plants showing new growth
- Clear, odorless water
Documentation tip: Keep detailed logs during first 30 days. Patterns help identify and prevent recurring issues in your aquaponics system setup.
Most first-month problems resolve with patience and consistent monitoring as biological processes stabilize.
Conclusion
Building a successful aquaponics setup transforms from overwhelming complexity to manageable steps when you follow proven protocols. This comprehensive guide provides everything needed to launch your sustainable food production system with confidence.
Key success factors recap:
- Choose the right system type for your space and goals
- Invest in quality components, especially pumps and aeration
- Follow the 7-day setup timeline methodically
- Master water quality management during cycling
- Avoid common mistakes that crash 60% of new systems
- Plan realistic budgets with 6-24 month payback periods
- Maintain consistent schedules preventing 90% of failures
Your aquaponics setup represents more than a gardening project—it’s a sustainable food security investment producing fresh fish and vegetables year-round while using 90% less water than traditional farming.
Next steps for success: Start with a small-scale system to master fundamentals before scaling up. Document everything during your first 30 days to identify patterns and optimize performance. Connect with local aquaponics communities for ongoing support and troubleshooting assistance.
The learning curve feels steep initially, but most growers achieve system stability within 6-8 weeks. Your investment in time and resources pays dividends through years of fresh, organic food production and the satisfaction of sustainable self-sufficiency.
Ready to begin your aquaponics journey? Start planning your system today—your future self will thank you for taking this important step toward food independence and environmental stewardship.
What’s your first step going to be? Share your aquaponics setup plans in the comments below, and let’s build a community of successful growers together!
Frequently Asked Questions (FAQ)
How much space do I need for an aquaponics setup?
Minimum space requirements vary by system type. Small aquaponics setups need just 20-30 square feet for 50-gallon systems producing lettuce and herbs. Medium family systems require 50-100 square feet, while commercial operations need 200+ square feet. Vertical systems maximize production in smaller spaces, perfect for urban environments.
Can I start aquaponics indoors without natural sunlight?
Absolutely! Indoor aquaponics setups use LED grow lights providing 6-8 hours daily illumination. Budget 30-50 watts per square foot of growing space. LED systems cost 40-80 USD monthly in electricity but enable year-round production regardless of climate or season.
What fish species work best for beginners?
Tilapia tops the list for new aquaponics setup builders due to hardiness and rapid growth. Goldfish work well in decorative systems, while trout thrive in cooler climates. Catfish tolerate varying water conditions. Start with 1 fish per 5-10 gallons until your system matures.
How long before I can harvest food from my system?
Leafy greens like lettuce and spinach harvest in 3-6 weeks after aquaponics setup completion. Herbs take 4-8 weeks, while fruiting plants like tomatoes need 8-12 weeks. Fish typically harvest after 6-12 months depending on species and desired size.
What’s the biggest mistake new aquaponics growers make?
Rushing the nitrogen cycle causes 70% of early failures. Never add full fish capacity immediately after aquaponics setup. Allow 2-6 weeks for beneficial bacteria establishment before reaching maximum fish loads. Patience during cycling prevents costly fish deaths.
How much money can I save on groceries with aquaponics?
Well-managed systems produce 100-500 USD monthly in fresh produce equivalent depending on size. Small aquaponics setups typically save 50-150 USD monthly on organic vegetables and herbs. Larger systems can completely eliminate grocery store produce purchases for families.
Do I need any special permits or licenses?
Home aquaponics setups rarely require permits. Commercial operations may need food safety certifications and business licenses depending on local regulations. Check with local health departments and zoning authorities before starting large-scale production systems.
Can aquaponics work in cold climates?
Yes! Greenhouse or indoor aquaponics setups operate successfully in any climate. Insulation, heating systems, and climate control enable year-round production even in northern regions. Many Canadian and Scandinavian growers achieve excellent results with proper winterization.


